How to copy a directory (aka folder) or file from a teacher folder to your own home directory
You can either manage files through the RStudio GUI or programmatically. When you decide to do it programmatically, you can either use shell commands in the RStudio built-in Terminal, or R commands (either directly in the Console, or you write a script). This howto describes only the GUI way.
RStudio has a built-in file explorer (bottom right pane, menu tab Files). By default, you can see the contents of your home directory.
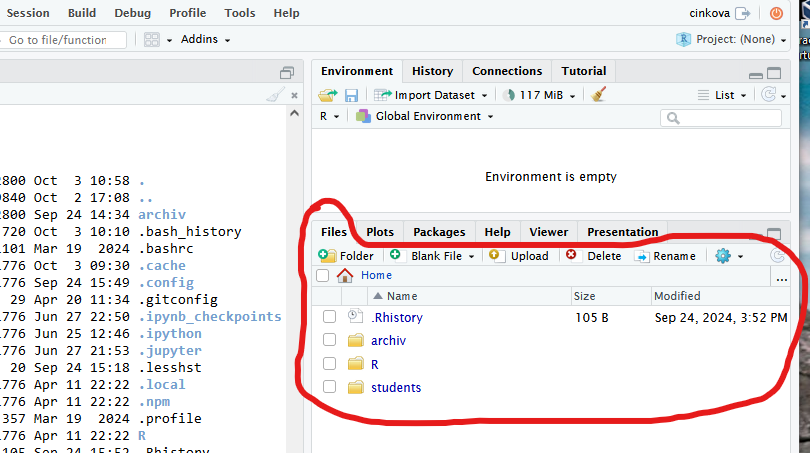
To move, rename, delete, and copy files and folders within your home directory, you can use the corresponding buttons. However, copying content from teachers' folders requires a different approach.
Copy a file
To see the structure above your home directory, hit the ellipsis (three periods) button to the top right. Type in two periods and hit OK.
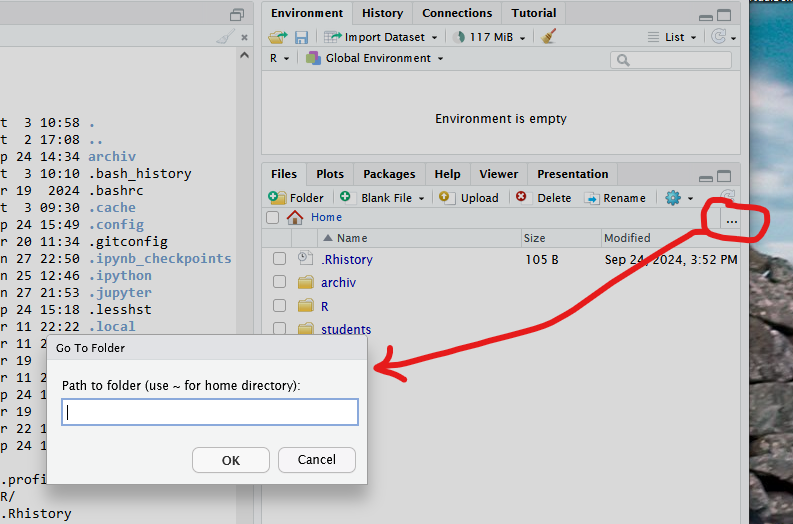
To look inside Silvie's and Václav's directories, scroll for cinkova and cvrcv9af . Or type the directory name directly into this window like so: ../cvrcv9af or ../cinkova.
You can possibly look into all teachers' directories. Although teachers apparently can't look into yours, you'd better not store anything confidential in your home directory.

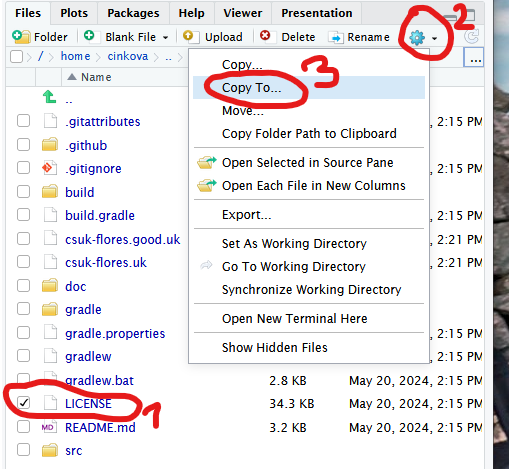
To make a copy of an individual file, you just navigate to that file by clicking the corresponding icons and you select it by ticking its checkbox. Next, you hit the gear button and select Copy To... from the roll-down menu. In the example below, the copied file is a file titled LICENSE from a subdirectory in a directory named popel. In the background, you see M. Popel's files in a subdirectory named nkp_uk.
You choose the destination folder (your home) by clicking inside the path like below.
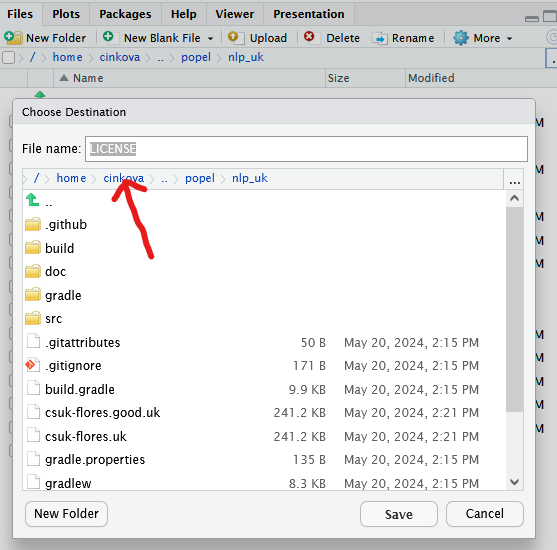
This relocates you to your home directory where you can navigate to subdirectories. At the end of this operation, you will still be located in the source directory (here M. Popel's home). To return back home, click on your home directory name in the path again.
Copy a directory
The approach is almost identical but somewhat counterintuitive in one step.
In this example, you want to copy a directory named doc from popel/nlp_uk to your home directory. You have ticked it in the checkbox, hit the gear button, selected Copy To, and clicked the path to relocate to your home directory.
Now, the form wants you to fill out a File Name. (Yes, File name, not Folder name, that was the confusing bit.) This is actually the name under which you will store the source directory. In the example below it gets called doc_target. Hit Save and navigate back to your home directory by clicking its name in the path.
You ought to see the a new directory with your selected name in your home directory:
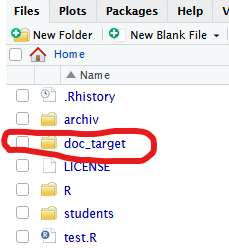
Inside this new directory, you are not going to see the original doc directory but directly its contents (in this case, these were three markdown files). You could as well have used the original directory name for your new directory.
Back to Teaching Materials


